SailMail / Airmail
After installing Airmail, there is a little more setup required in order to configure it for use by LuckGrib. LuckGrib will be communicating with Airmail via the SMTP and POP3 protocols. Airmail has support for these, however it needs to be turned on and configured slightly. This is very easy.
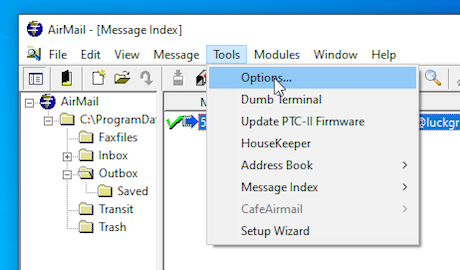
Startup Airmail on Windows. In the Tools menu, select Options…
Click on the Modules tab:
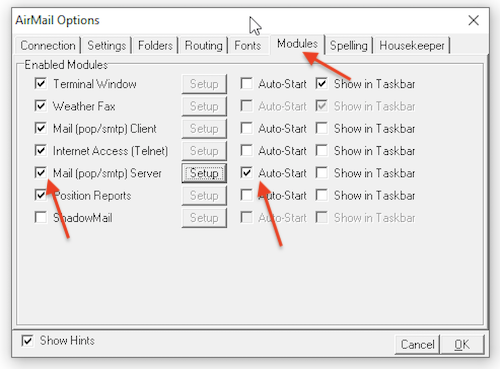
Then turn on the Mail (pop/smtp) Server, and also have it automatically start each time you start Airmail. All of the other settings can remain the same.
You then need to customize a number of settings in the POP/SMTP setup window. Click on Setup on the Mail server line:
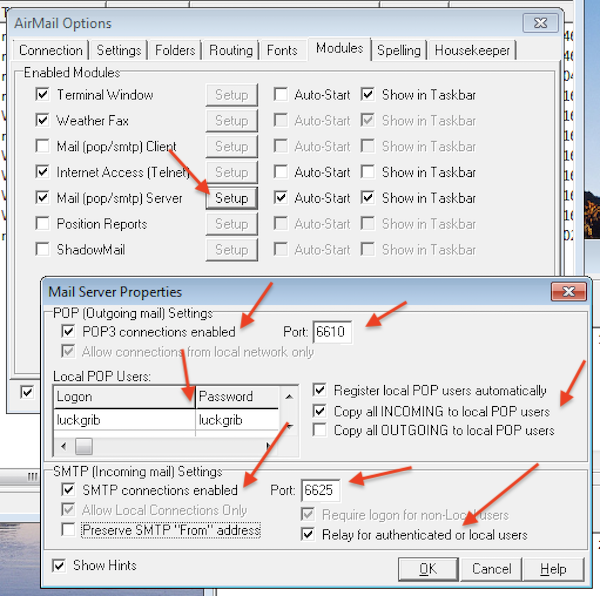
Edit the Mail Server Properties until they match the image above:
- turn on POP3 connections
- turn on SMTP connections
- change the POP3 port to 6610 (from 110)
- change the SMTP port to 6625 (from 25)
- add a local POP user with name: luckgrib, password: luckgrib
- ensure the ‘Copy all INCOMING to local POP users’ option is enabled
- ensure the ‘Relay for authenticated or local users’ option is enabled
The POP and SMTP ports are modified from their default values to avoid any possible problem with other software running on the system. The default values use the industry standard values for those ports. If you have any other mail software running, there may be a conflict. Note that the ports used here must match the port forwarding rules if you are running Airmail inside of a virtual machine.
You need to create a local POP user. This is the user that will be used by
LuckGrib in order to send and receive email from Airmail. Note that this
is not the call sign you used when setting up Airmail. This POP users
email will be separate from the rest of the email you send and receive from
Airmail. In this example, I’ve entered a username of luckgrib and given
the same password. This is just fine. These values must
match what is provided in LuckGrib when SailMail is configured there.
If the ‘Copy all INCOMING’ option is not set, then LuckGrib will not be able to automatically receive new messages containing GRIB data.
If the ‘Relay for authenticated’ option is not set, then LuckGrib will not be able to send mail through Airmail.
Once you are finished with those changes, click OK.
Now quit and restart Airmail. You should now see two windows appear, the main Airmail window as well as the POP/SMTP server window. Yay! We’re getting there.
After the restart, you may find that Windows warns you about Airmail trying to communicate, and should you allow that? Yes, you should.
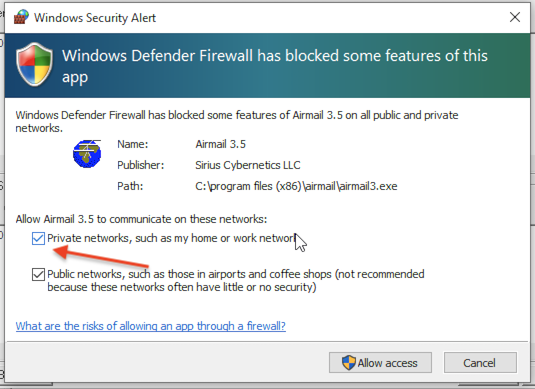
Turn on the Private networks and Public networks options and click Allow access.
There is one last customization to Airmail.
You need to tell Airmail how to properly route email from SMTP through its system. To do this, as you did earlier, click on the Tools menu and select *Options…
This time, click on the Routing tab:
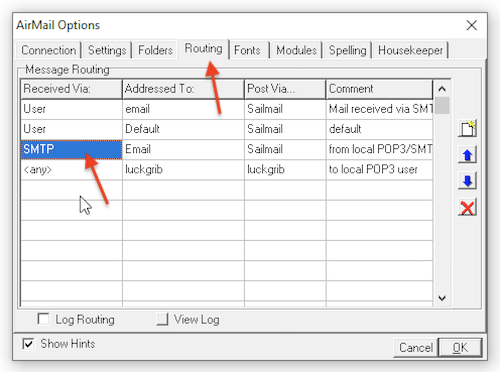
There is one edit to make. The third line may initially start with
SMTP.local. You want to edit that field to read SMTP (i.e. edit out the .local portion.)
You’re finished with the Airmail customization. That wasn’t so hard, right?